The following are some simple examples.
Basic Mouse Events:
This example demonstrates how to capture and display basic mouse events such as clicking and scrolling on the Earth.
reearth.ui.show(`
  <style>
    html{
      margin: 0;
      width: 300px;
      background: white;
    }
    #wrapper {
      height: 100%;
    }
  </style>

  <div id="wrapper">
    <p>Please left Click On the Earth</p>
    <div>ScreenX: <span id="x"></span></div>
    <div>ScreenY: <span id="y"></span></div>
    <div>Longitude: <span id="lng"></span></div>
    <div>Latitude: <span id="lat"></span></div>
    <div>Height: <span id="height"></span></div>
    <div>LayerId: <span id="layerId"></span></div>
    <div>Mousewheel Delta: <span id="delta"></span></div>
  </div>

  <script>
    const setValue = (id, value) => {
      document.getElementById(id).innerHTML = value ?? '';
    }
    addEventListener("message", e => {
      if (e.source !== parent) return;
      if (e.data.type === 'mousedata') {
        setValue('x', e.data.payload.x);
        setValue('y', e.data.payload.y);
        setValue('lng', e.data.payload.lng);
        setValue('lat', e.data.payload.lat);
        setValue('height', e.data.payload.height);
        setValue('layerId', e.data.payload.layerId);
        setValue('delta', e.data.payload.delta);
      }
    })
  </script>
`);

reearth.on('click',(mousedata) => {
  reearth.ui.postMessage({
    type: "mousedata",
    payload: mousedata
  }, "*");
});

reearth.on('wheel',(mousedata) => {
  reearth.ui.postMessage({
    type: "mousedata",
    payload: mousedata
  }, "*");
});
In this example, a user interface (UI) is displayed using the reearth.ui.show() function. The UI includes placeholders to display information related to mouse events. The UI consists of HTML elements to indicate screen coordinates, longitude and latitude, height, layer ID, and mouse wheel delta. This UI is intended to be filled with data from mouse events.
The addEventListener("message", e => {...}) script within the UI listens for messages sent by the plugin using reearth.ui.postMessage(). When a message with the type "mousedata" is received, the script updates the UI elements with the corresponding data from the payload of the message.
The reearth.on('click',...) and reearth.on('wheel',...) functions allow your plugin to listen to mouse click and mouse wheel events on the Earth's visualization. When these events occur, your plugin sends a message containing relevant data to the UI. This data includes information such as screen coordinates, longitude, latitude, height, layer ID, and mouse wheel delta. This data is then used to update the UI elements to reflect the details of the mouse event that occurred.
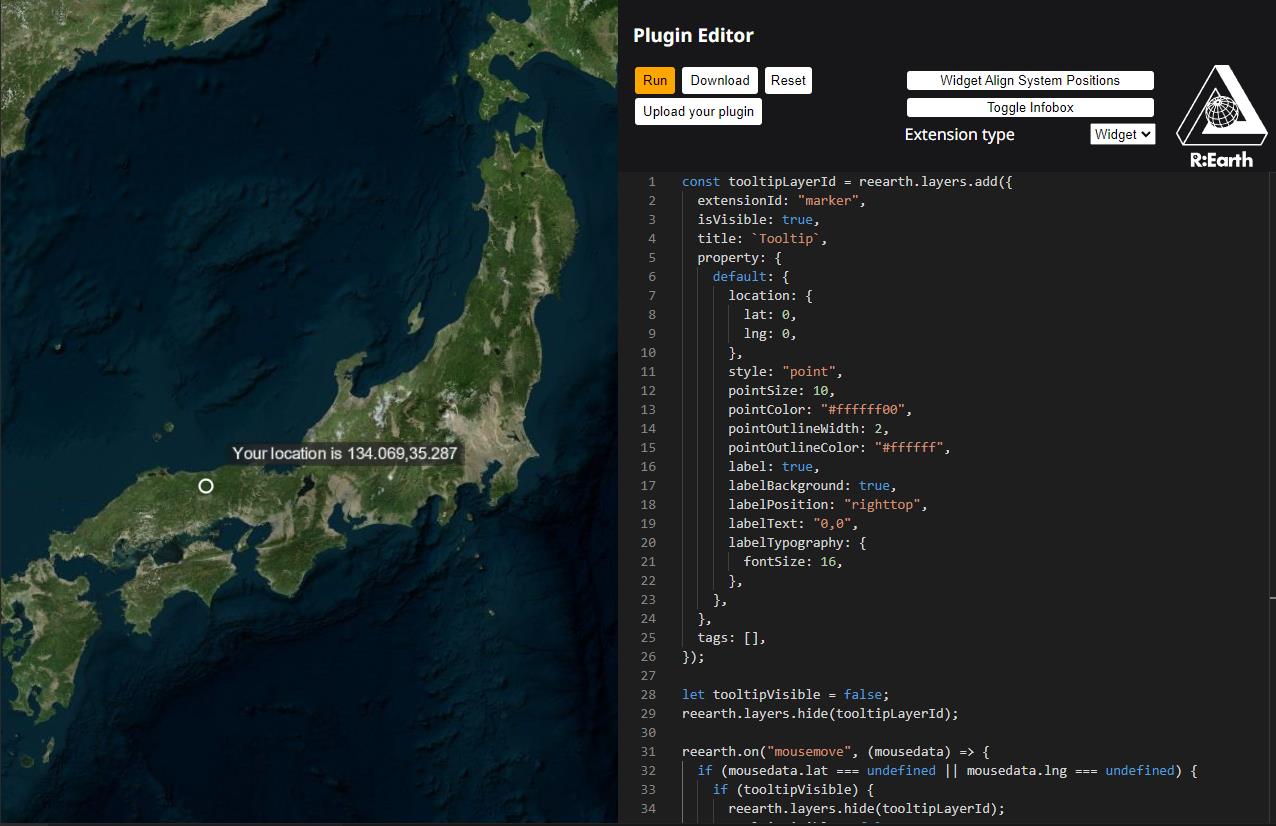
This example shows how layers can follow the cursor, which can open up possibilities for developing more interactive plugins.
This example demonstrates how to make layers within the Earth's visualization follow the cursor as it moves. This can be particularly useful for creating interactive effects and highlighting specific elements within the visualization based on the cursor's position.
const tooltipLayerId = reearth.layers.add({
  extensionId: "marker",
  isVisible: true,
  title: "Tooltip",
  property: {
    default: {
      location: {
        lat: 0,
        lng: 0,
      },
      style: "point",
      pointSize: 10,
      pointColor: "#ffffff00",
      pointOutlineWidth: 2,
      pointOutlineColor: "#ffffff",
      label: true,
      labelBackground: true,
      labelPosition: "righttop",
      labelText: "",
      labelTypography: {
        fontSize: 16,
      },
    },
  },
  tags: [],
});

let tooltipVisible = false;
reearth.layers.hide(tooltipLayerId);

reearth.on("mousemove", (mousedata) => {
  if (mousedata.lat === undefined || mousedata.lng === undefined) {
    if (tooltipVisible) {
      reearth.layers.hide(tooltipLayerId);
      tooltipVisible = false;
    }
    return;
  }

  reearth.layers.overrideProperty(tooltipLayerId, {
    default: {
      location: {
        lat: mousedata.lat,
        lng: mousedata.lng,
      },
      labelText: `Your location is ${parseInt(mousedata.lng * 1000) / 1000},${
        parseInt(mousedata.lat * 1000) / 1000
      }`,
    },
  });

  if (!tooltipVisible) {
    reearth.layers.show(tooltipLayerId);
    tooltipVisible = true;
  }
});
NOTE THAT: These examples collectively demonstrate how Re-Earth plugins can leverage mouse events to provide users with more interactive and engaging experiences. By capturing mouse interactions and updating UI elements or layer behavior accordingly, plugins can enhance the user's interaction with the Earth's visualization.